%20(1000%20×%20700%20px)%20(1000%20×%20650%20px)%20(1000%20×%20670%20px)-700x500w.png)
How To Install Click Luxury Vinyl Tile (LVT) Flooring? ---A Complete Guide
 Flooring? ---A Complete Guide")
22 Apr
2 Comment(s)
24684 View(s)
How to install Click Luxury Vinyl Tile (LVT) Flooring? A Complete Guide
In some circumstances, you or your installer may prefer to use a full-spread adhesive, but it's not required. Some collection instructions may also recommend adhesive if expansion due to high sunlight exposure is a risk.
All of our Rigid Core Flooring products feature a "floating floor" structure, meaning that instead of gluing or nailing the boards down, you will lock them together – side to side, end to end – creating a surface that 'floats' atop the subfloor.
Installing your Aquacore Flooring:
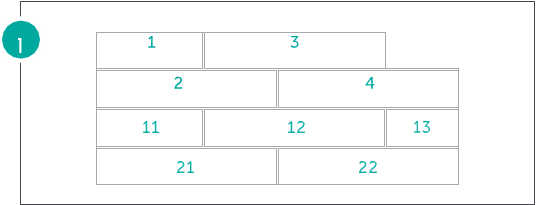
Step 1 - Establish Stagger & Align
Products should be staggered in bricklaid pattern, stagger equal to half of a plank.
Tools needed: Planks, underlayment, spacers, rubber mallet, cutter.
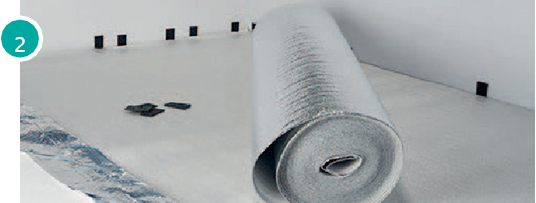
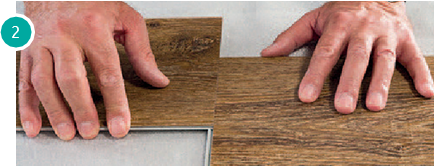
Step 2 - Prepare Floor
In case of an uneven floor, place underlayment, Set spacers of equal thickness, appropriately disanced, for the required expansion gap.
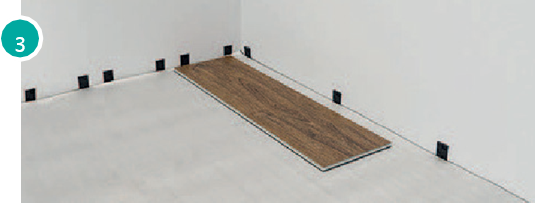
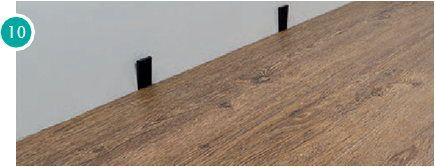
Step 3 - Install 1st Plank
It is very important that the first row is installed straightly.
To realise this, installation alternates back and forth between rows one and two, for the first two rows only.
Start with a small plank (1) and posi- tion this plank close to the wall.
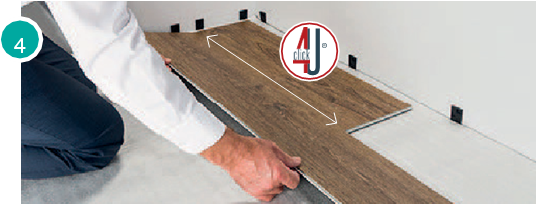
Step 4 - Install 2nd Plank
Now select a long plank (2). Using the Click4U angle system, angle the long side of plank 2 on to the long side of plank 1.
Drop plank 2 to lock. Make sure there are no gaps.

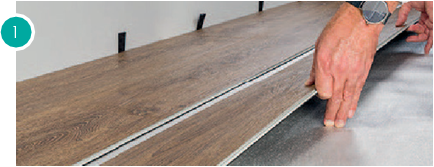
Step 5 - Engage 3rd Plank on Long side
Take another long plank (3). Repeating the previous step, insert the long side of plank 3 into the long side of plank 2.
Then slide plank 3 to your left until the short side is in contact with the short side of plank 1.
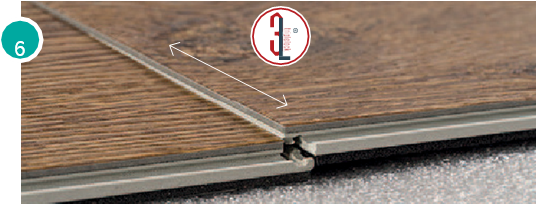
Step 6 - Engage 3rd Plank on Short Side (Part 1)
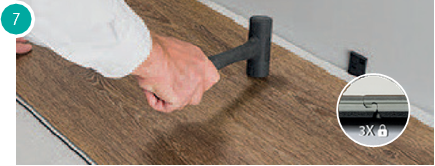
Using the 3L TripleLock one piece drop-lock system, drop the short side of plank 3 onto the short side of plank 1.
22 Comment(s)
Thanks for taking the time to discuss this, I feel strongly that love and read more on this topic. If possible, such as gain knowledge, would you mind updating your blog with additional information? It is very useful for me.
Thank you so much for the post you do. I like your post and all you share with us is up to date and quite informative, i would like to bookmark the page so i can come here again to read you, as you have done a wonderful job.
Leave a Comment